For the latest Patron Portal features, visit https://community.webcheckout.net/patron-portal/ for latest updates.
This document reviews Patron Portal in v6.0 and through August 2022. For v5.0 and earlier, please visit Patron Portal v5.0 and earlier.
Allow Patrons to view, create, edit, and cancel Reservations through the Patron Portal. The Patron Portal also provides a dashboard to view latest Checkouts, upcoming Reservation, Save Lists and Bookmark Resource Types.
Accessibility
Patron Portal accessibility icon ![]() improves text contrast for readability. According to our testing, for best results with JAWS version 2018.1805.33 use with Chrome 66.0.359.181. When using images in the Patron Portal Login Message of the Day and Patron Portal Checkout Center Message, please remember to utilize the Alt text feature.
improves text contrast for readability. According to our testing, for best results with JAWS version 2018.1805.33 use with Chrome 66.0.359.181. When using images in the Patron Portal Login Message of the Day and Patron Portal Checkout Center Message, please remember to utilize the Alt text feature.
How to Log In
Access the Patron Portal from the ![]() icon in WebCheckout and select Patron Portal. Copy the URL and provide to Patrons.
icon in WebCheckout and select Patron Portal. Copy the URL and provide to Patrons.
Patrons who have access to the Portal will log in with their WebCheckout Person-ID and password. For those with the Authentication Module, Person-ID and password are managed by the institution, however, the WebCheckout Person-ID must match the institution ID. Without the Authentication Module, password must be created in WebCheckout.
1. Enter Person-ID and Password and click Login. If you do not know you password select the Forgot my Password hyperlink. Instructions to reset your password can be found here.
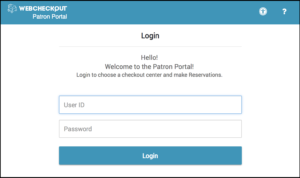
Login Screen
2. Choose Checkout Center
Log directly into Patron Portal with access to a single Checkout Center. With access to multiple Checkout Centers, the Choose Checkout Center box appears and Patron must select the Checkout Center.
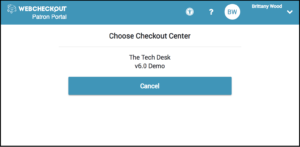
Choose Checkout Center
Once a Checkout Center has been selected, or if Patron has access to only one Center, Patron is logged into the Home Screen.
Message of the Day
Once logged in, the Message of the Day modal may appear. The Message of the Day may contain import Checkout Center information. Select ![]() to close the modal, and to review the message again, select the
to close the modal, and to review the message again, select the ![]() icon, then Message of the Day.
icon, then Message of the Day.
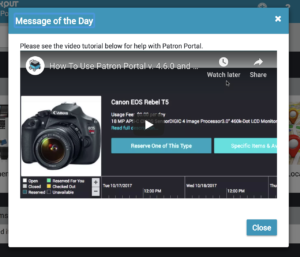
Patron Portal Message of the Day
Patron Portal Message can be edited from the Checkout Center Patron Portal tab.
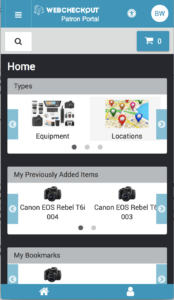
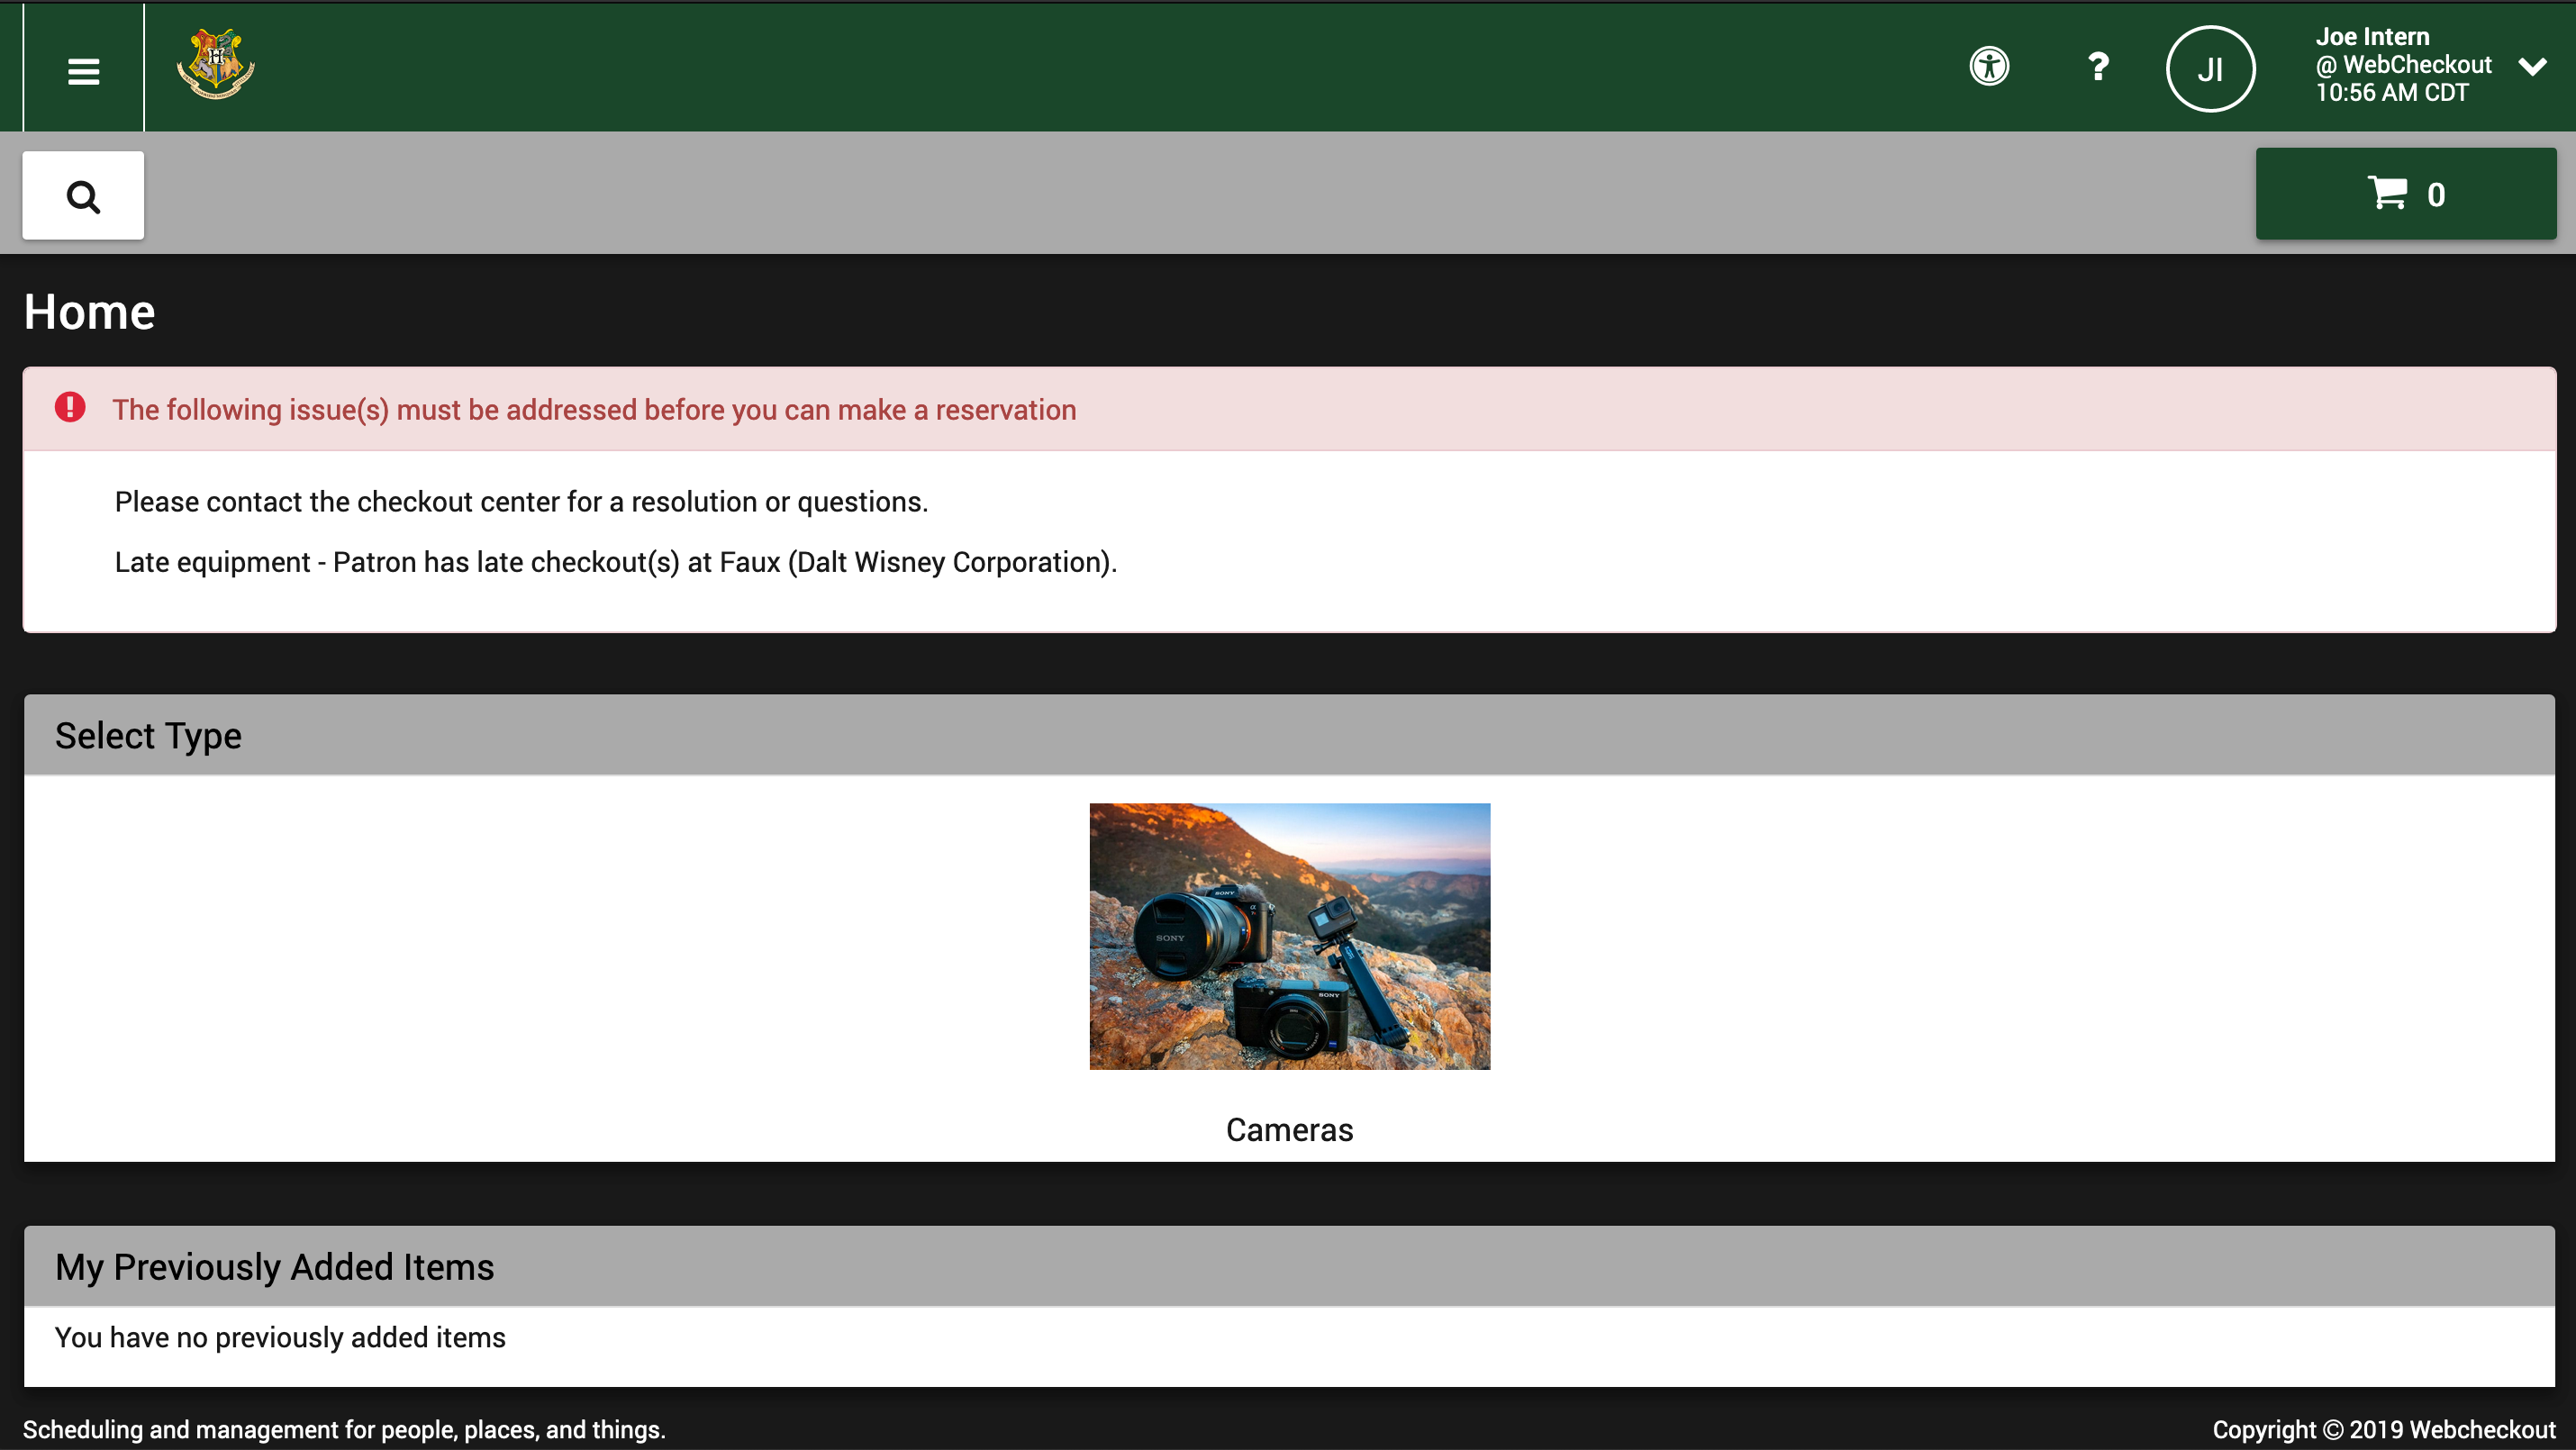
Patron Portal Home Screen
The Patron Home Screen allows Patrons to browse Resources, view previously reserved Resources, and bookmarked Resource Types. Create Reservations by browsing through the available Types or by selecting a Resource previously reserved or bookmarked. Outstanding issues preventing Patron from scheduling Reservations display on the Home Screen. Outstanding issues include: Patron Hold, Late Resources, Overdue Invoice, and No Signature on File. If you see any of these issues listed you will be unable to create a Reservation using the Patron Portal and we recommend contacting the Checkout Center for steps to resolve.
Full Stop Warning
As of v9.0, outstanding issues preventing Patron from scheduling Reservations display on the Home Screen. Outstanding issues include: Patron Hold, Late Resources, Overdue Invoice, and No Signature on File. Please note, Checkouts within the Renewal Grace Period but past the Scheduled Return Time will not prompt the full stop warning in Patron Portal. Patrons will be able to make a Reservation in the Patron Portal within this window.
New Reservation
Reservations created in the Patron Portal will be visible in WebCheckout. Several areas of the New Reservation screen are configurable from the Checkout Center’s Patron Portal tab. Please visit Patron Portal Settings for details.
Create New Reservation by Selecting Allocation Start and End Time First
- In V8.0 and later, Patrons can create Reservations in Patron Portal by selecting the Allocation Start and End Time first. To add Allocation times first, select the Cart icon
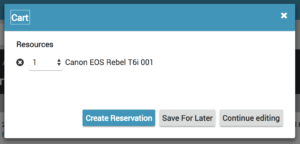
 at the top, right-hand corner of the screen. Selecting the cart icon will open the cart modal.
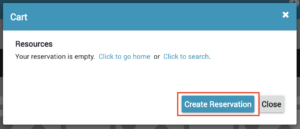
- From the cart modal, select Create Reservation to proceed. Selecting Create Reservation will prompt the Review Reservation screen.
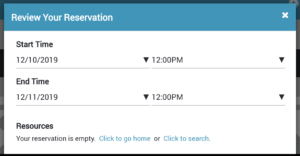
- Enter Start Time and End Time or Duration for the Reservation.
- For those using v11.0 and later, if Circulation Windows are enabled, Patrons will only see available time windows populate when they go to make a reservation.
- Now, add Resources to the Reservation by selecting Click to go home or Click to search. Follow instructions below to review how-to add Resources to the allocation.
Create New Reservation by Selecting Resources First
- To add Resources first, browse through Resources on the Patron Home Screen or search for Resource using the search icon
 at the top of the screen. Selecting the search icon will display nested Resource Types similar to version 5.0 and earlier.
- Click
 to scroll through the carousel in the Types section. Click through the nested Resource Types until the Reserve one of this Type or the Specific Items option appear.
 - Patron can also select a Type from Previously Added Items or My Bookmarks sections.
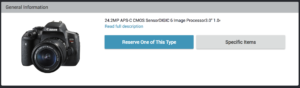
2. Select Reserve one of this Type or select ![]() next to a Resource to add item to the cart. One or both of these options may be available depending on Checkout Center settings.
next to a Resource to add item to the cart. One or both of these options may be available depending on Checkout Center settings.
- Multiple pages of Resources may display for the Resource Type,
to search for a specific
Resource search option can be used to search for a specific Resource.
Resource within the list list of Resources, use the Resource search option.
- Click the
 icon next to the Resource Type name to view the Timeline and availability of specific Resources.
 - To add the Resource Type to the My Bookmarks section, select
 .
. - To view attachments, click the attachment icon
 . Select an attachment to view.
3. Click the Home option to return back to the Home Screen and reserve additional items.
4. Once all items are added, select the shopping cart icon ![]() to review order.
to review order.
5. Review items added to your cart, then select Create Reservation to proceed. Selecting Create Reservation will prompt the Review Reservation screen.
6. Enter Start Time and End Time or Duration for the Reservation.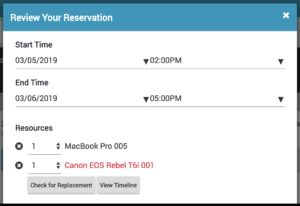
- If a Resource or Resource Type is unavailable the unavailable item will display in red. Two options will appear below unavailable Resources to help resolve the issue: Check for Replacements and View Timeline.
- To replace unavailable item with an available item: select Check for Replacements to view other available Resources of that Type. For those with the RRT Module, available Fallback Types will be suggested.
- To view when selected item is available: select View Timeline. Adjust the Start and End Times accordingly.
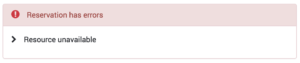
- A Resource Unavailable error will appear.
Add Additional Allocation Information and Resolve Errors
7. Add an Attachment if applicable. Please note, attachments cannot be removed from the allocation once uploaded. To remove attachment, please select Save for Later to save list of Resources, then Logout of Patron Portal and Log back in to create a new Allocation without the attachments. Attachments will be visible to Operators in WebCheckout. Attachments can be accessed after submitting the Reservation in the My Account menu.
8. Add Class or Event Title if option is available by adding text into the field. Please note, this information may be required to complete the Reservation.
9. Specify a Delivery Location if option is available by selecting a location from the drop down menu. Please note, this information may be required to complete the Reservation.
10. Schedule Repeat Reservations if option is available by clicking Add repeats.
12. Include notes to the Checkout Center in the Add note to Checkout Center staff field.
12. If the Reservation has Errors header appears, click the message to view details of issues that must be corrected to submit the Reservation. 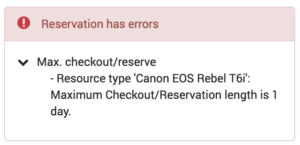
- Patrons must abide by all Policies; cannot have a Hold; cannot have an Overdue Invoice; must have Signature on File when required; and cannot possess Late Resources. If these conditions are not met, the Reservation cannot be confirmed.
12. Click Submit Reservation.
- Selecting Save for Later will add these items to a saved list which can be accessed at a later time, and complete the Reservation. Saved Lists must include a name.
13. Once Reservation has been made, a confirmation will appear at the top of the screen. The Home Screen will load. Patrons can view upcoming Reservations by selecting ![]() then My Account.
then My Account.
View Allocations, Lists, and Bookmarks
My Account screen displays information specific for the Patron at the Checkout Center. The My Account screen will display new Reservations along with any Repeats. Additionally, Current Checkouts, History, and Saved Lists will be visible. WebCheckout will show the Patron as the Operator, indicating the Reservation was made from the Patron Portal. To view the My Account screen, select ![]() then My Account. Select an Allocation or a bookmarked Resource Types for more information.
then My Account. Select an Allocation or a bookmarked Resource Types for more information. 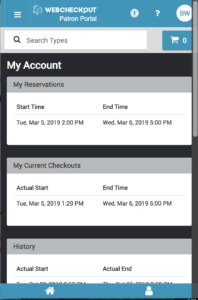
- My Reservations: Displays upcoming Reservations.
- My Current Checkouts: Displays current Checkouts.
- History: Displays returned/completed Checkouts.
- My Groups: Displays Patron’s Groups.
- My Bookmarks: Displays bookmarked Resource Types.
- My Saved Lists: Displays saved list of items.
Edit Reservation
Reservations can only be edited if the Start Time is outside of the Minimum Reservation Lead Time Policy. Additionally, if Patron Portal Reservations require approval, only those that have not yet been approved and outside of the Minimum Reservation Lead Time Policy can be edited.
1. Navigate to the My Account page.
2. Under My Reservation, click on the Reservation to prompt the View Reservation window.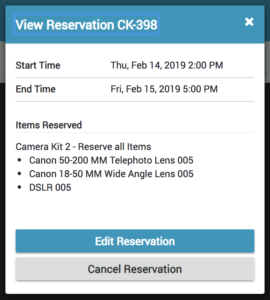
3. Select Edit Reservation.
When Patron Portal Reservations Require Approval, Reservations with Pending Approval status can be canceled or edited. Reservations that have an Approved status can only be canceled and not edited in the Patron Portal.
4. Make changes to the Reservation including:
- Change Start and/or End Time by clicking on the Shopping Cart icon and adjust the times.
- Add Resources by search for or clicking through the categories of Equipment.
- Remove Resource, click the Shopping Cart icon then click
 next to the Resource to remove.
- Remove Resource, click the Shopping Cart icon then click
5. Click Submit Reservation to save. Confirmation will appear.
Cancel Reservation
In the View Reservation window, select Cancel Reservation. Confirmation of canceled Reservation will appear.
Renew Reservation
Renewals may not be allowed at your Checkout Center, depending on the Center’s policy settings. If Allow Self Service Renewals in enabled in Patron Portal Settings, Patrons can renew their reservations provided they are within the Renewal Grace Period and Renewal Count Limit set in the Checkout Center Allocations tab. In the View Reservation window, Patrons can select ![]() to edit the return time of the allocation.
to edit the return time of the allocation.
The Renew Checkout modal displays the current Renewal Limit and  Max Checkout Reserve limit available and any warnings the Patron must correct to complete the renewal.
Copy Completed Checkout
Copying completed Checkouts will add the original Resources to a new Reservation. To copy a completed Checkout: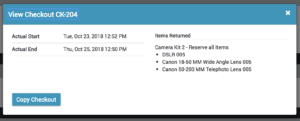
- Select the Allocation from the History section to open the View Checkout window.
- Click Copy Checkout.
- Click the Shopping Cart icon to adjust Pickup/Return Times and add/remove items.
- Click Submit Reservation to save new Reservation.
Report a Problem
Located in the menu ![]() , Report a Problem allows Patrons to submit Tickets. Requires the Repair and Preventative Maintenance Module and the Checkout Center must enable this feature. Ticket Summary and Description are required fields. Patron may add an attachment to ticket by selecting Add Attachment. Please note, all Attachments from Patron Portal are Protected. Ticket will show the Patron as the Reporting Patron.
, Report a Problem allows Patrons to submit Tickets. Requires the Repair and Preventative Maintenance Module and the Checkout Center must enable this feature. Ticket Summary and Description are required fields. Patron may add an attachment to ticket by selecting Add Attachment. Please note, all Attachments from Patron Portal are Protected. Ticket will show the Patron as the Reporting Patron.
Calendar URL
Located in the menu ![]() , Calendar URL provides Patrons their unique ICS Feed URL to view their Checkouts and future Reservations in an iCalendar. Copy the Calendar URL and add to their iCalendar of choice. Requires the Messaging Module.
, Calendar URL provides Patrons their unique ICS Feed URL to view their Checkouts and future Reservations in an iCalendar. Copy the Calendar URL and add to their iCalendar of choice. Requires the Messaging Module.